(Written by William)
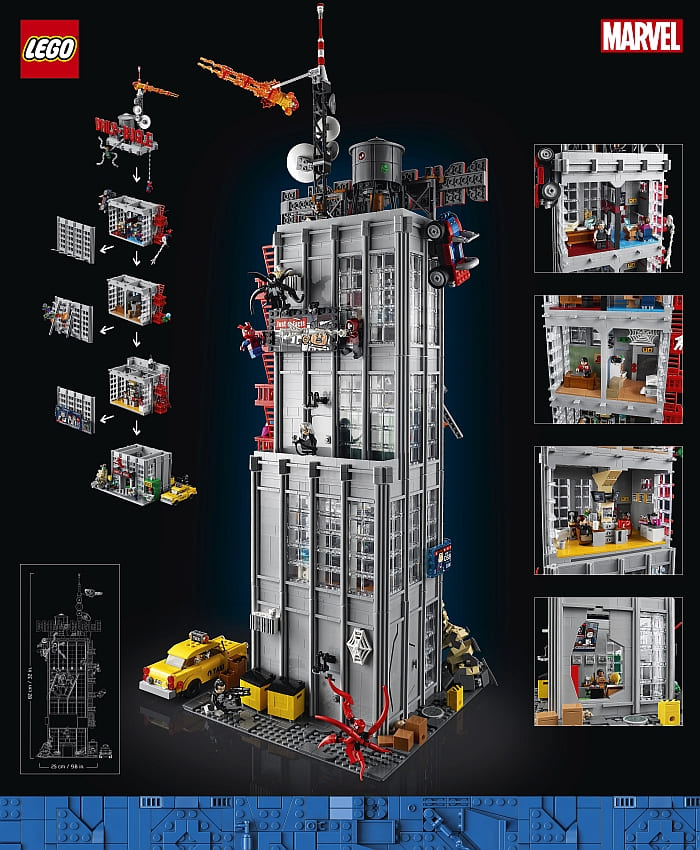
The recently released #76178 LEGO Marvel Super Heroes Daily Bugle has a lot going for it. It comes with minifigs that were never released before, like Punisher, Daredevil, Black Cat, etc. It is also compatible with the LEGO Modular Building series, so you can add it to your LEGO city as is, or use it as a template for a skyscraper.
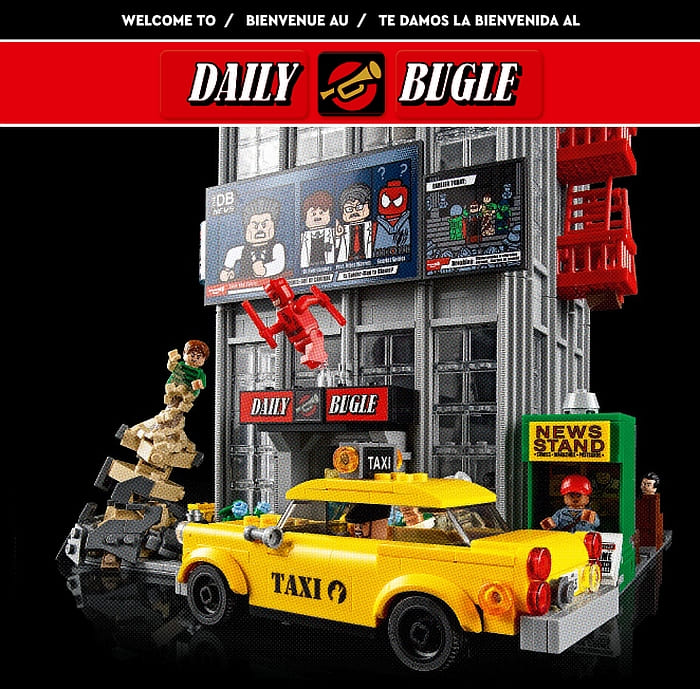
In addition, the set is based on the story of Spider-Man, one of my favorite heroes. Yes, the set is $300, which is a lot of money, but based on what you get, I feel it’s worth it. But instead of just showering this model with my biased phrase, I will share my overall thoughts in the video below, then let’s discuss some of the unique features and interesting techniques.
HISTORICAL RETROSPECTIVE
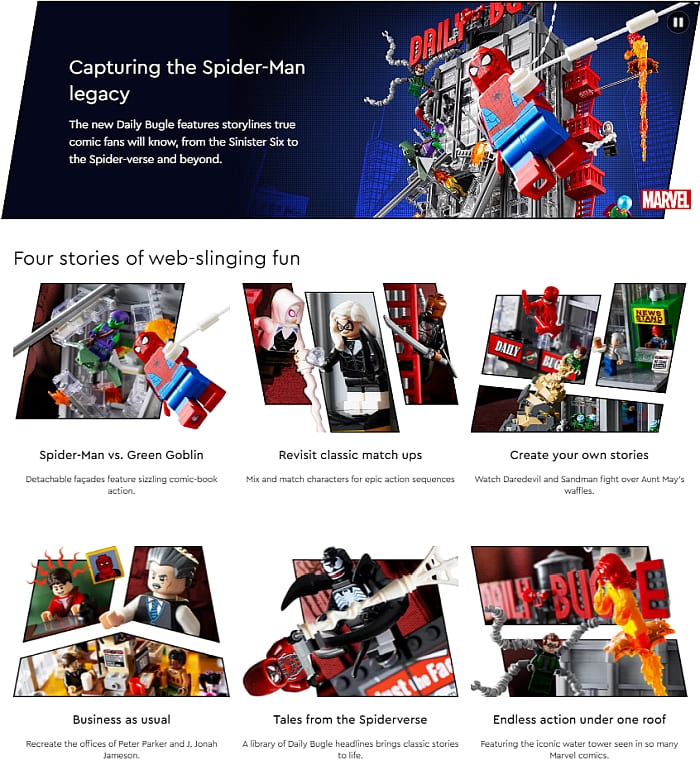
Unlike most large models with a mess of minifigures, the #76178 LEGO Marvel Super Heroes Daily Bugle aims to capture the history of Spider-Man. Other sets tend to focus on a specific event in time, but in this set, the past, present, and future are all wrapped in a fairly recognizable landmark from the Spider-Man mythos.

Keep in mind, that this set is also more related to the comics than the Marvel Cinematic Universe. The closest thing we get to a movie-related character is Miles Morales and Spider-Ham from Into the Spider-verse. The bottom line is that this set is geared towards fans craving all things Spider. You get classic enemies like Green Goblin and Sandman, enemy-turn-ally in Punisher and Black Cat, and there is even a nod to Spider-Man and his Amazing Friends in Fire Star.
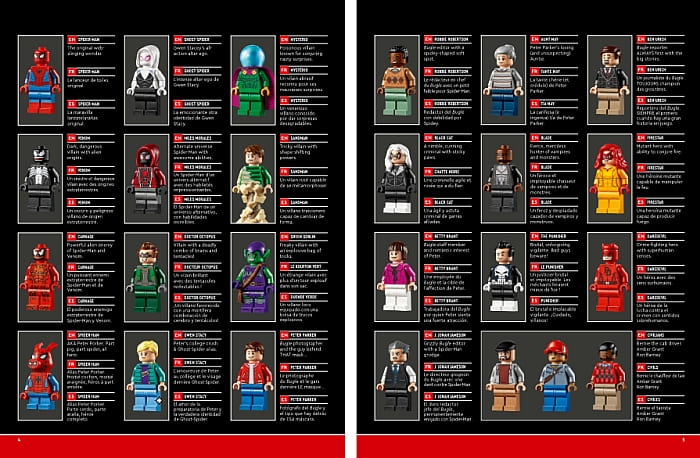
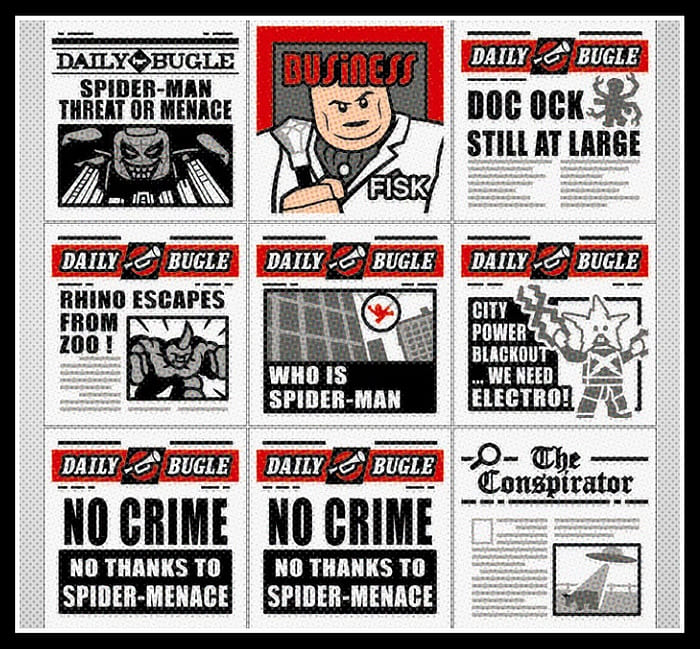
Even stickers and newspapers make mention of other significant Spider stories. The reference to his trouble with clones is one that tickled me. Ultimately, you can look at any detail and ask “What is that about?” and chances are there is a whole story arc behind whatever it is. In addition, it is especially nice to have a reference for all the characters inside the instruction manual. The descriptions given aren’t very detailed, but they are enough to give you a clue as to how they relate to Spidey.
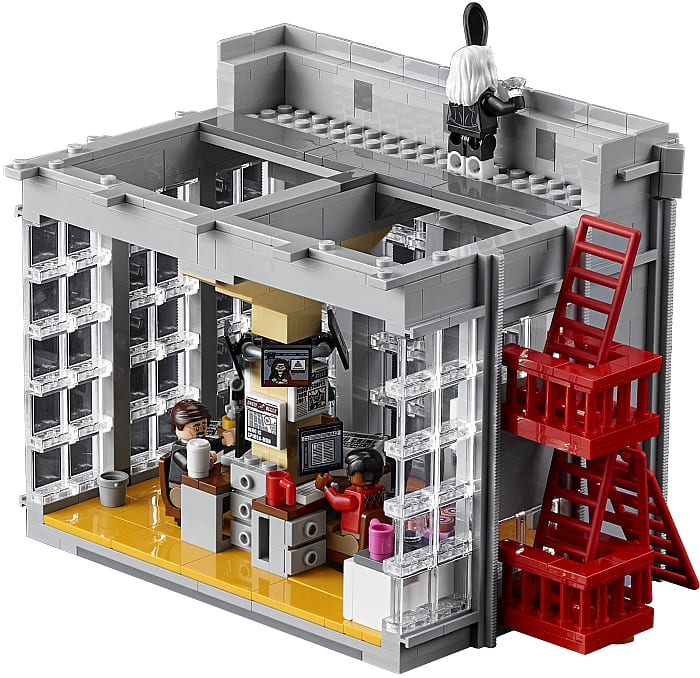
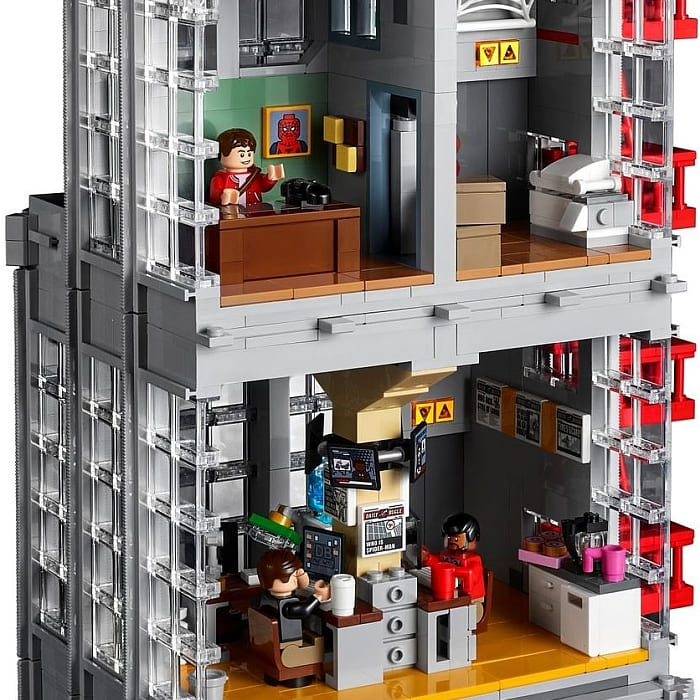
There is also a bit more action than usual going on at the Daily Bugle, which is why, I believe, LEGO designers must have chosen to make the model picturesque from all four sides. Many of the LEGO Modular Buildings have sides that are not as nice to look at. However, in order to display all the stories taking place with all the different characters, it is helpful to simply turn the building to a different side and have a whole new scene set up right in front of you.
The upside to all of this is that you have a building chock-full of key moments. Any one of these scenarios would make a true Spidey fan drool. However, having so many details can be a bit overwhelming. I noticed that I find it hard to bring myself to even mess with any of the included scenes. And although I know you can use fewer minifigs, but then it feels like a shame to have a whole pile of characters being unused. But if there is a particular Spider story you love, this can really help recreate that moment.
WORKING WITH TALL FLOORS
Having twenty-five minifigures to display requires a lot of space. However, the building only takes up a 32×32 baseplate. In addition, it also is fully decorated on all four sides. Given all these restrictions, the simplest solution is to go up, and that is exactly what LEGO designers did.
The normal minifigure-scaled building floor is usually eight bricks high plus/minus a plate or two. However, each of the floors in the Daily Bugle stand thirteen bricks and one plate high. This very specific height is due to the straight rail elements used on the side of the building. They are what determine each floor’s height, and they are crucial to the stability of the entire model.
One of the more frustrating aspects of this build is that there is a noticeable lack of interlocking elements. There is a little at the top and bottom of each floor, but the majority of the walls are linear columns. By having the rails present, it encourages these columns to stay together. Additionally, they provide more rigid sections for the small bit of interlocking sections to work with.
A great majority of the building consists of clear panels to make up all the windows. Given the fact these elements are thin by their nature, there is a great deal of instability in the sides of the structure. To compensate for this weakness, you essentially are constructing sturdy frames for the clear elements to exist in. Once all the windows are in place, you do end up with a floor that is sufficient for the job, but it’s not a building method I’d recommend.
The upside of an elongated floor is that you can build something remarkably impressive. And you can also sneak in a bit of illusion. For instance, looking at the fire escape side, it is easy to imagine this building has nearly twice the number of floors it actually does. In fact, not including the roof, this building stands at 53 bricks and 1 plate tall, which puts it on par with a building that contains seven floors. Though, all this comes at a price.
If you plan to use unique colors, windows, or patterning in any shape or way, you may be forced to create tall columns like we see in this set. You could make your walls double thick, but you’ll loose a good deal of space and essentially add twice the weight to your model. And let’s just say weight and tall structures aren’t suited to one another. However, if you are forced into this situation, the Daily Bugle is a decent design to pull inspiration from for your own creation.
DESTROYED/RESTORED CUSTOMIZATION
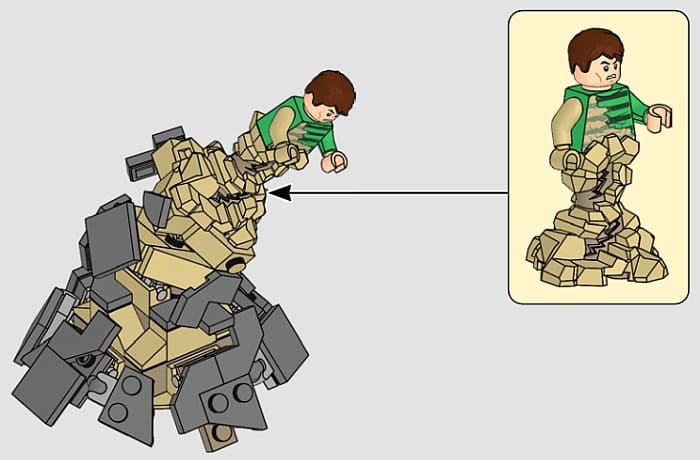
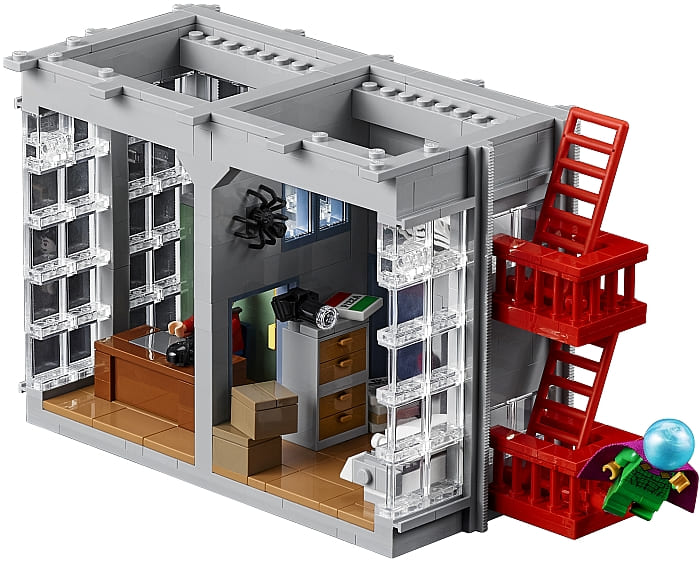
Given the fact that this model is a massive display piece, it’s no surprise there are a few staged points of destruction. What’s interesting is that LEGO used three methods to present these action elements. We have the effect of Sand Man bursting from the sidewalk. There is the slotted puzzle approach seen on the side of the first floor where a jagged hole is revealed by removing a chunk of the wall. And then there is a really complex build with Green Goblin, where the destruction is painstakingly created with elements positioned in unusual angles.
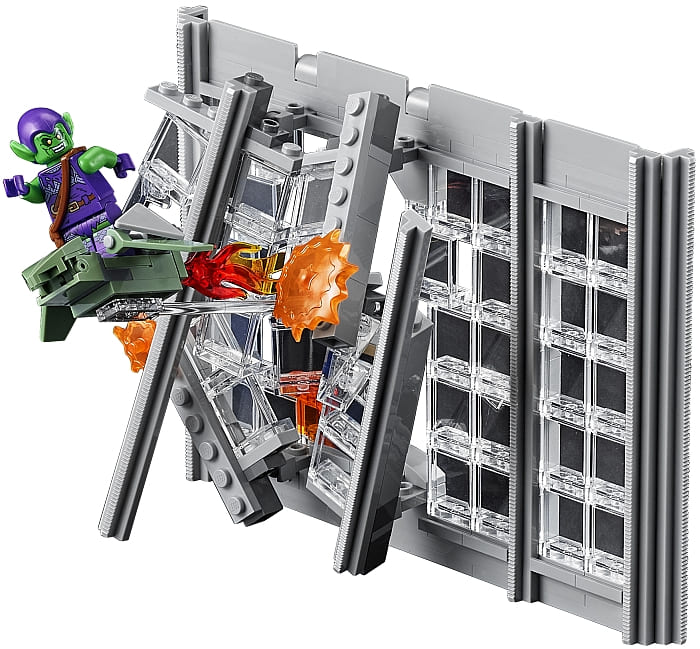
Though it is interesting to note, if you’re the fan that wants a fully intact Daily Bugle, you don’t have to settle for the destruction found in the manual. The first two styles of destruction are the simplest to remedy. You can remove Sand Man from the scene and you can simply leave the wall section in the building. The harder part is the Green Goblin scene.
The LEGO designer working on this set stated that they left all the pieces you need to make an unbroken section of wall. To do this, you’ll want to study similar sections like the window to the right or windows on other floors for an idea on how to do this.
If you want to see it done, I recommend checking out Ashnflash on Youtube, since he devoted an entire video to this. As he points out, there will be a good deal of extra parts left when you are done, as these are used for both positioning the parts in a kinetic blast as well as to give the illusion of parts of the building being twisted and reshaped from the explosion.
It may sound strange to Spidey enthusiasts, but I know there are fans out there that just want to use this set as a regular news building. The Super Heroes hold no interest for them, which gives them something interesting to trade with those who only want the minifigures. So, if you are at all concerned about the excessive action elements of this model, know that with a bit of work you can have a perfectly ordinary news building.
LEGO DAILY BUGLE – SMALL INCONSISTENCIES
With any large model, there will always be inconsistencies in the build. After all, the LEGO modeling process is more about making a representation of something rather than a perfect reproduction. So, I want to point out a few aspects that I can see might bug some people. I wasn’t bothered by them myself, but I do know people who will want to modify their set in order to fix these issues. This section is not meant to criticize, but to list what people might want to prepare for in order to make changes.
First up, the fire escape is not usable by the people inside the building. The windows that lead out to the fire escape are undersized and don’t open. You can change this by using standard window frames and make it so that they open inward. There is enough room in the wall to make this change. Simply remove the existing windows and bricks and you’ll have the necessary space. Though it is important to point out, the fire escape itself is more of a decorative representation, which is why it never bothered me.
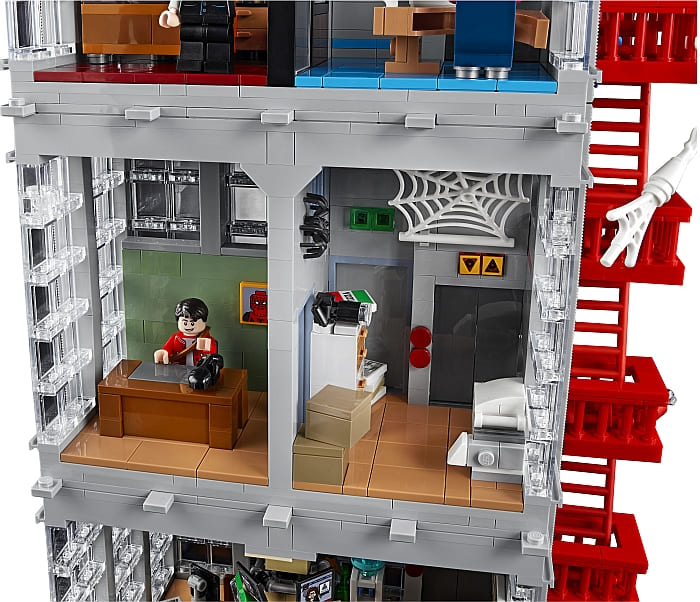
Second, the elevator does not line up with the first two floors. On every floor of the building, the elevator doors are placed in the back right. However, starting on the third floor, the back wall is moved forward. This breaks the line of where the elevator shaft should be. One fix would involve extending the third and fourth floors back or, for the more creative, finding a new wall for the elevator to be located in. The reason why it didn’t bother me was that the elevator is simply a faux design. You are just building buttons and doors to give the sense of where an elevator should be.
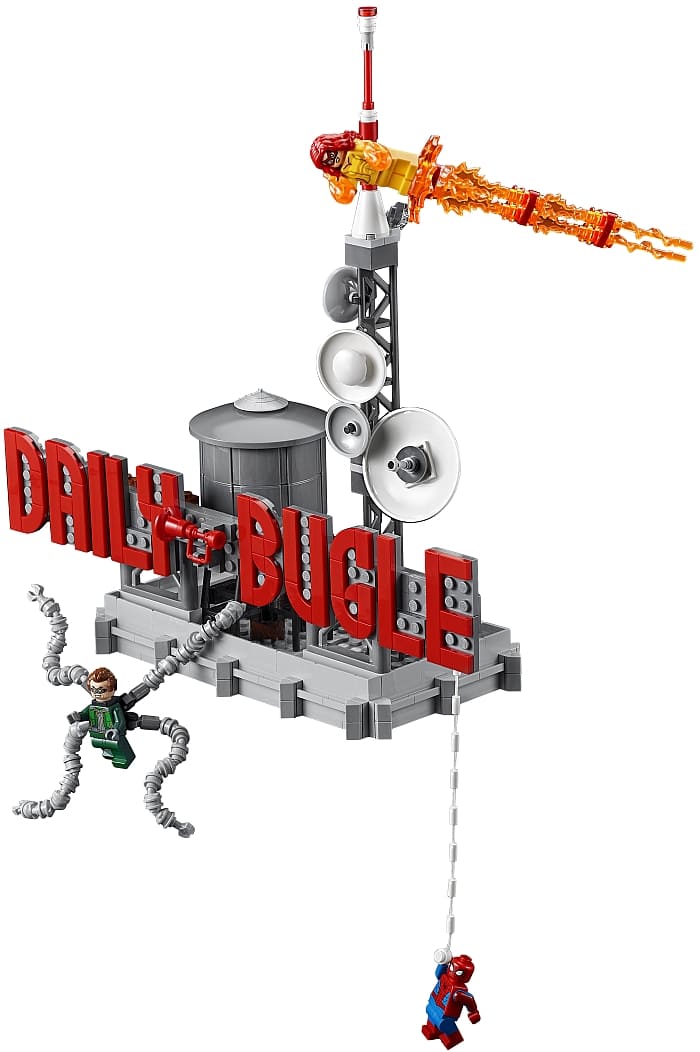
Third, there is a massive water tower on top of the building. However, the only other water feature I could identify is a hydrant out front. There are no sinks, toilets, or fountains in this model. I’d suggest repurposing what looks to be Peter Parker’s office on the third floor. As far as I recall, he’s a freelancer so wouldn’t really have an office of his own. I’d turn that room into a kitchenette/break room for the staff. Of course, J.J. is probably too cheap for that. But this would be a good way to add in a sink. The reason why it doesn’t bother me is that this could have been a refurbished building. The tower was left because J.J. is too cheap to have it removed properly. So, it could simply be a deactivated feature that adds to the decorative element of the building.
Finally, there is no printing press. Now, there’s no reason the press has to be in the same building, however, there are plenty of newspapers around indicating that they are printed somewhere. As I mentioned with the last inconsistency, the room on the third floor would be an ideal spot to build a printing press. As far as my thoughts on the matter, the Bugle is meant to be a high-end paper. So, it makes sense that their printing and distributing facilities are located in a different building. This is just where everything gets written and put together.
LEGO DAILY BUGLE – FINAL THOUGHTS
The Daily Bugle, in the end, is probably one of the best LEGO Super Hero display pieces in minifigure scale I’ve seen. Honestly, if you want something that’s pure art, you can probably find better models. However, if minifigures are your thing, this is the set you want for showcasing them at their most extreme.
As for builders, this is the closest thing I’ve seen to a build-your-own massive building kit. As it is, there are only four floors, but with some minor alterations and a few extra parts, this can turn into at least twice the number of floors. You may have to replace the long straight rails on the sides with long tiles, but this set does not skimp on parts.
And for those of you who are new to the hobby, or this is your first really big planned purchase, the difficulty of putting this set together is minimal. It doesn’t force you to align strange components to make something functionally work. This does mean that the building techniques are on the simpler side, but to make up for it, you get details like a cracked sidewalk, each floor has its own color carpeting, each face of the building has at least one very different feature or aspect, etc. The bottom line is that this is not a set that is going to burn your brain while building, but still keeps the building process interesting and impresses at the end.
I admit I wasn’t blown away like I have been with other large sets – though that is probably due to the fact I was really hyped about it. Fortunately, it managed not to disappoint me, which is not easy these days with all the amazing sets coming out. Ultimately, this is a model that aims to please. Collectors and builders alike will find something here. The whole concept checks off so many boxes that anything it doesn’t do feels rather trivial.
I tried my best to find anything that might stand in your way of getting this set. All that really comes to mind is the price. The price per piece is fair, but it is in that realm where we have to be a bit more responsible. But if that is not a barrier for you, I think you will find it is well worth the money. If you want to check it out, visit the LEGO Marvel Super Heroes section of the Online LEGO Shop.
What do you think? How do you like the Daily Bugle? Do you have it already? Or are you planning to get it? And what do you think of the interesting features we discussed here? Feel free to share your thoughts and own reviews in the comment section below!
And you might also like to check out the following related posts: